
Get Started With Your Google Analytics Configuration: Part 2
Here we are again and as promised, part two, of your Google Analytics configuration. In my last post, “Get Started With Your Google Analytics Configuration”. I walked you through creating “views” within your Google Analytics account. Now that you have your initial views set up, your Google Analytics account should look something like the following when you log in.
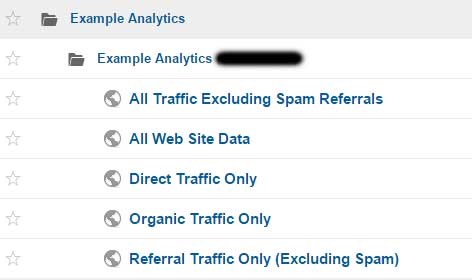
Let me explain what each of these views will do for you and your client.
- All Traffic Excluding Spam Referrals
- This view is going to show you all of the traffic to your website, but will exclude all of those spammy referrals that damage our bounce rate
- All Web Site Data
- This view will have ZERO filters. We need to leave a default view so we have 100% accurate data. This is important because filtering views incorrectly will give you false data which cannot be reset
- Direct Traffic Only
- This view will show you ONLY direct traffic to your site. This means only sessions by users who typed your full domain in the address bar of the internet browser
- Organic Traffic Only
- You got it! This view will only show traffic coming from search engine results pages
- Referral Traffic Only
- Traffic and data displayed in this view will only show site sessions of users who were sent from another site. Examples would be: another blog site referencing your site, social media or business directory sites
Now let us take a look at how to set the filters up within each view.
All Traffic Excluding Spam Referrals
First, let’s block the client’s and our own IP address so that we do not contribute a session every time we go to the site.
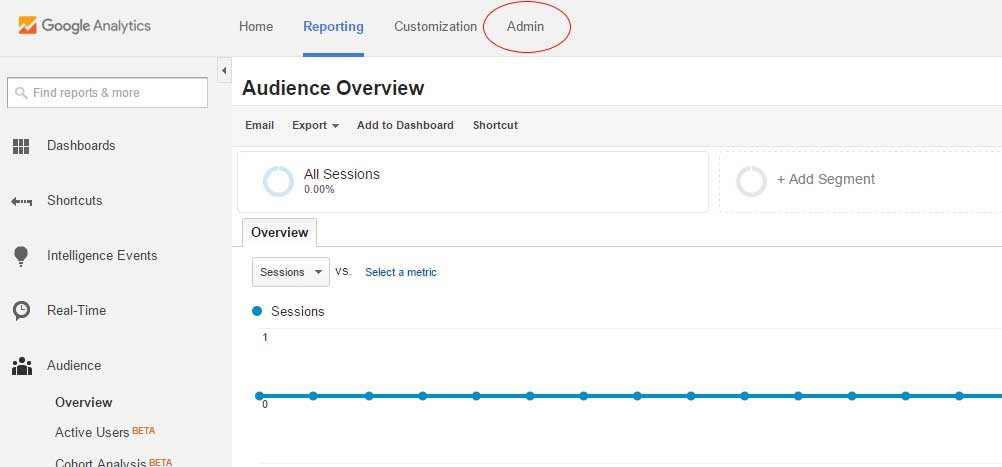
- Click on the view to enter the interface
- Click on “Admin” in the top navigation
- You will now need to click on Filters, which is located about a third of the way down the far right column. Ensure the view selected is the correct view. In this case, it should be the “All Traffic Excluding Spam Referrals”
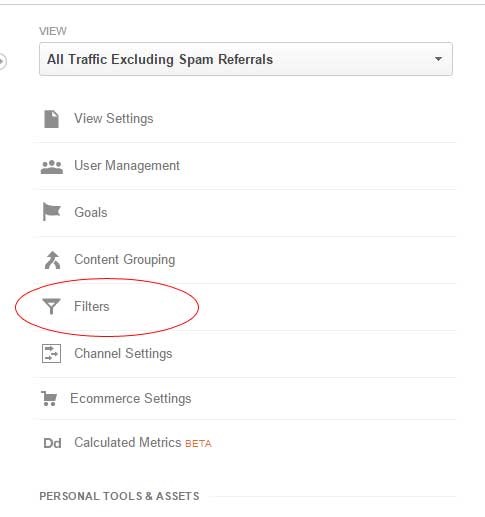
- Click on “Add Filter”
- Let’s Exclude Our IP address
- Enter filter name
- click on “select filter type”
- exclude
- click on “select source of destination”
- “traffic from the IP address”
- Click on “select expression”
- “that are equal to”
- Enter your IP address
Below is a screen-shot of what you should have:
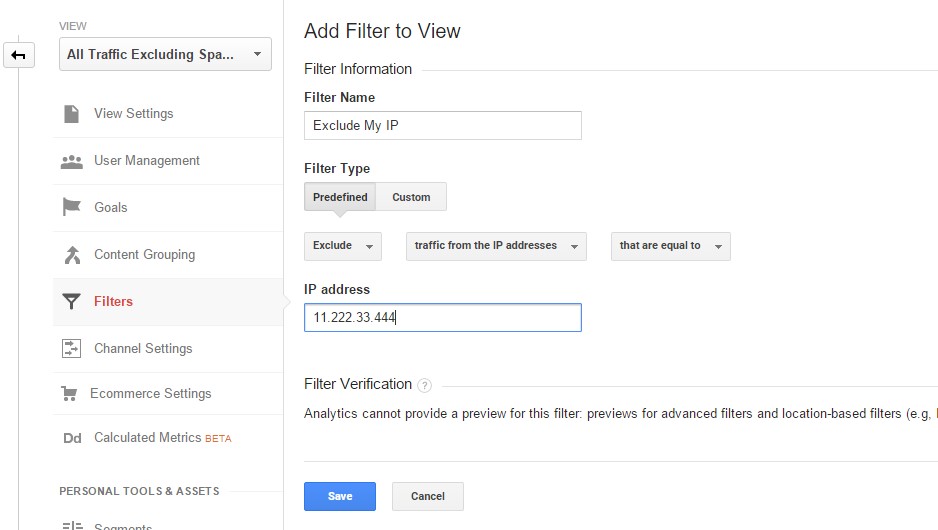
- Click “Save”
You now have your first filter set up within this view. Next we are going to set up the spam referral filters.
- Once again, click on “Add Filter”
- Give the filter the name “Exclude Spam Referrals 1”. I used a number because you will have many after some time.
- Next you will click on “Custom”
- Ensure “Exclude” radio button is checked
- Click on “Select Field”
- Choose “Campaign Source”
- Next you will set your filter pattern. I am going to provide you with a regular expression that will go into the input field. The reason I am using a regular expression is so that I can block multiple sites within one filter. Be careful there is a maximum character limit here.
- .*((darodar|priceg|semalt|buttons\-for(\-your)?\-website|makemoneyonline|blackhatworth|hulfingtonpost|o\-o\-6\-o\-o|(social|(simple|free)\-share\-buttons)\.com|econom\.co|ilovevitaly(\.co(m)?)|(ilovevitaly(\.ru))|(humanorightswatch|guardlink)\.org)).*

- Now click “Save”
You may need to read about these regular expressions if you are not familiar with them. For now just use what I have provided and work off that for the rest of your spam referrals.
You will repeat the previous steps in order to create all of you spammy referral filters that you may require. If you want to see what spammy referrals are sending “traffic” to your site, you can see this data within your Analytics account.
Direct Traffic Only
** Make sure you are in the correct view when setting up filters**
In this view, you will be adding the “Exclude My IP” filter and all of your spam referral filters. Good News! You can add existing filters within each analytics account so you do not have to create them again. Here is how:
- Once in “Direct Traffic Only” view, click on “Add Filter”
- Check the “Apply Existing Filter” radio button
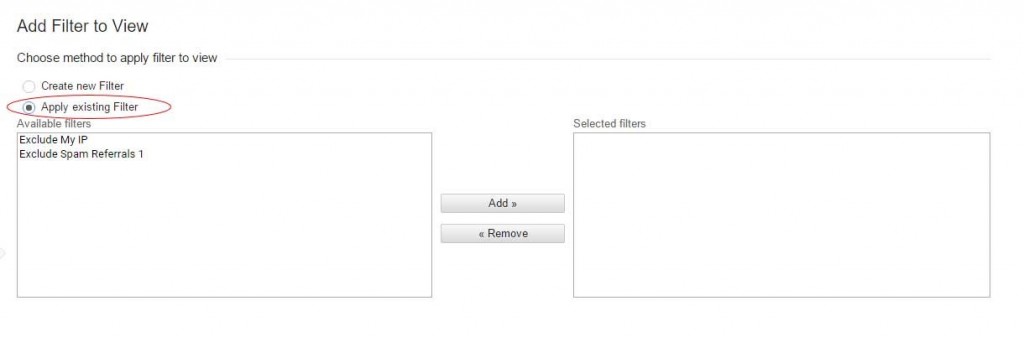
- You will now have a list of your existing filters on the right hand side.
- Click on each filter you want to add and then click the add button
- Click “Save”
- You will now see all those filters applied to this view

Now let’s create the “Include Direct Traffic” filter
- Click “Add Filter”
- Give your filter a name like “Include Direct Traffic”
- Click on “Custom”
- Ensure Include is selected NOT exclude
- Click on “Select Field”
- “Campaign Source”
- In the “Filter Pattern” field type “direct” **No Quotes**
- Click on “Save”
Your View is now only going to include “Direct Traffic” to your site.
Organic Traffic Only
In this view, you will repeat all of the steps required in “Direct Traffic”. The difference will be what you are including. After you add your IP and spam referral filters you will do the following:
- “Add Filter”
- Name the filter “Include Organic Traffic”
- Click on “Custom”
- Again ensure that “Include” is selected NOT “Exclude”
- Click on “Select Field”
- Campaign Medium (Not source)
- Type in the filter pattern “organic” **Again No Quotes**
- Click “Save”
Your Organic Only view is now set up.
Include Referral Traffic Excluding Spam
In this view, you will follow the exact same steps as “Organic Traffic Only”. There will be one difference with this view. Instead of adding the filter pattern “organic”, you will instead type “referral”.
That is all. Your views are now set up. If your filters are working properly, you should see different numbers beside each view in the home screen of your Analytics account.